|
05-16-2016, 07:38 PM
|
|
Free Member
|
|
Join Date: May 2016
Posts: 15
Thanked 0 Times in 0 Posts
|
|
So, interestingly enough, I just captured a full 8mm tape (same one as before) with 0 dropped frames. There were 10 inserted frames, but anecdotally it appears as though it just inserts a couple here or there between scenes on the tape. An 11th inserted frame occurred at the end of the tape.
I will post Vdub stats below. The only differences are that I turned A/V->DV to off and I changed PB Mode to Hi8/8. So far for all of my captures I have captured audio, including this one. The problem I was having earlier was that I was also enabling audio playback during the capture. So, what do we think about those findings?
Here are the VirtualDub stats for the capture:
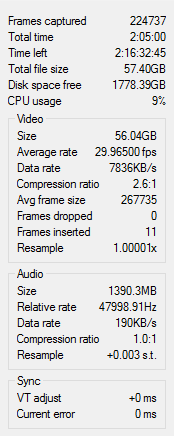
The file came out to be about 60 GB. That's twice the size of the DV captures I'd been getting over firewire. And that's apparently with some amount of compression from Huffy. I wouldn't say the video quality is noticeably better than the DV captures I've done. In fact, with my limited sample size I'd be inclined to say it might be slightly worse, but obviously that's just one tape.
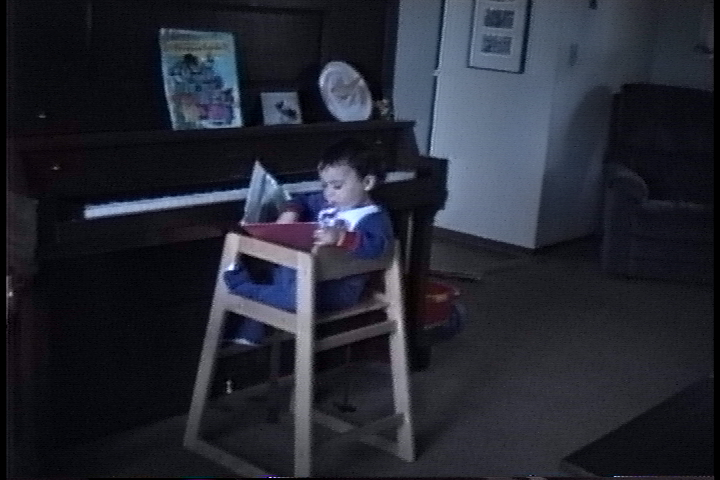
Is there anything I can do about low-light conditions? Here is a screenshot of what I am talking about :
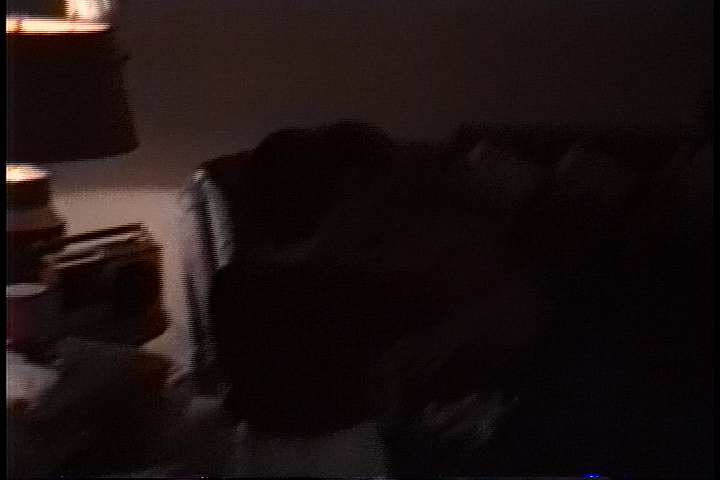
I also don't know what the preferred method of taking a screencap of a video is. I just used VLC player to do it. Anyway, is there anything I can do at this point to improve on that? Would I need to change the playback brightness settings on the camcorder prior to capture, or is it something that could be done either within the capture software or after the fact with Adobe Premiere or DaVinci Resolve?

|
|
Someday, 12:01 PM
|
|
Ads / Sponsors
|
|
Join Date: ∞
Posts: 42
Thanks: ∞
Thanked 42 Times in 42 Posts
|
|
|
|
|
05-16-2016, 11:34 PM
|
|
Free Member
|
|
Join Date: Dec 2015
Location: USA
Posts: 3,309
Thanked 545 Times in 503 Posts
|
|
|
See, You just saved $200 for yourself for an external TBC, As for DV quality, it is impossible that DV lossy compression is any were near losseless compression. You can tweak the brightness a little bit while capturing with Vdub but you have to be careful, Once it is captured it cannot be reversed.
|
The following users thank latreche34 for this useful post:
wolf_in_bull_city (05-16-2016)
|
|
05-16-2016, 11:40 PM
|
|
Free Member
|
|
Join Date: May 2016
Posts: 15
Thanked 0 Times in 0 Posts
|
|
Quote:
Originally Posted by latreche34

See, You just saved $200 for yourself for an external TBC, As for DV quality, it is impossible that DV lossy compression is any were near losseless compression. You can tweak the brightness a little bit while capturing with Vdub but you have to be careful, Once it is captured it cannot be reversed.
|
Ok so I would have to recapture the tape with different brightness settings in vdub? That's interesting. I would have guessed that anything that could be done within the capturing software could be done later in premiere/resolve.
Are there any standard recommended tweaks for the vdub brightness, or do you just leave it at the default unless there is a specific need for tweaking? And is it generally a custom tweak for every tape captured, or do you generally land on a good setting that works for most tapes recorded on that cam?
|
|
05-17-2016, 10:14 PM
|
|
Premium Member
|
|
Join Date: Aug 2009
Location: N. Carolina and NY, USA
Posts: 3,648
Thanked 1,308 Times in 982 Posts
|
|
Quote:
Originally Posted by wolf_in_bull_city
Ok so I would have to recapture the tape with different brightness settings in vdub? That's interesting. I would have guessed that anything that could be done within the capturing software could be done later in premiere/resolve.
|
YSuper-black or super-white luma or color values that are out-of-range in YUV during capture or other processing are clipped at the dark and/or bright end. Clipped means "destroyed". You'll never see those darkest or brightest details again, just as there's no dark detail to retrieve in the image you posted earlier. During color correction later, it's impossible to attain snappy, full dynamic range with clipped visual data that's destroyed during capture. I'd also advise that you depend on Avisynth, not Adobe, for consistent and correct color conversions between YUV and RGB and post-processing repairs.
Quote:
Originally Posted by wolf_in_bull_city
Are there any standard recommended tweaks for the vdub brightness, or do you just leave it at the default unless there is a specific need for tweaking? And is it generally a custom tweak for every tape captured, or do you generally land on a good setting that works for most tapes recorded on that cam?
|
Every tape has its own requirements, although corrections for invalid video recorded and input levels tends to encompass a general range of variations. Some tapes are nightmares and require strong correction. All corrections require that you use a histogram to see what's happening and to see what you're doing. If you don't know the basics of using histograms and other similar 'scopes (Adobe Premiere has about 8 of them, if I recall, which you paid for), you won't be able to see what you're doing. That's especially true when using an uncalibrated PC monitor.
VirtualDub capture has a luminance histogam that can be used fort analyzing input before starting a capture. Adjustments are made with the "Levels..." filter group, which are usually a simple hook-in to your capture device's proc amp controls. Using VirtualDub's histograms has been mentioned in several tutorials and has been posted in many threads in this forum. The most recent summary and explanation was on 4/23/2016 in post #18 at http://www.digitalfaq.com/forum/vide...html#post43646. In case you missed that thread, part of it is quoted below:
Quote:
You can get around that by adjusting brightness and contrast during capture. Don't use anything in VirtualDub's "filter stream..." menu. Any filter you enter there would be unsuitable. Rather, use your capture driver's proc amp controls by looking in VDub capture's "Levels..." menu. You should find at least a brightness and contrast control, which are all you'll need.
Contrary to what you'd think, "Brightness" controls black levels. "Contrast" controls brights. To some extent they interact, so you have to fiddle a bit but you'll soon get the idea. Instead of trusting your eyes on this, especially with an uncalibrated monitor, use VirtualDub's capture histogram. The histogram is available only in Preview mode. At the bottom of the capture window it looks like this:

Data in the unsafe "red" zones is in the crushing/clipping sector (darks on the left side, brights on the right). While the tape plays you adjust brightness and contrast so that as little as possible can overrun into the red sectors. Levels will change during play, but play just a few minutes to get an idea of how much they change. The area between the red zones indicates the video range RGB 16-235.
NOTE: black borders and head switching noise affect the histogram and can be deceptive. Black borders will always be a red "spike" at the left end. While you test levels, activate VDub capture's "Crop" menu. Use the little x and y inputs to crop off black borders and head switching noise while you view the histogram. When you get the levels you want inside the safe area, TURN OFF cropping. You can do that only by setting all crop values to zero again. Just clicking the crop menu item won't turn it off.
Don't forget to turn off cropping. I forgot it once and captured 90 minutes at the wrong frame size, making the whole capture useless.

Turn off the histogram before you begin capture. Some darks might look a bit bright but that's easily fixed afterwards and better than losing them. If your capture card is crushing everything below RGB 16, this is one way to fool the damn thing -- just don't feed it video darker than RGB 16, which would be in the "red" area on the left. Even with a card that doesn't crush anything (my AIW's don't), you would still have to play tricks to clean up out-of-range data.
Vdub capture's "Video" menu also has items named "extend luma white point" and "extend luma black point. Please don't turn on those items. Not ever.
|
|
The following users thank sanlyn for this useful post:
wolf_in_bull_city (05-17-2016)
|
|
05-17-2016, 11:31 PM
|
|
Free Member
|
|
Join Date: May 2016
Posts: 15
Thanked 0 Times in 0 Posts
|
|
Wow, awesome post! Thanks for that explanation and for quoting the other thread. You're right, I hadn't seen it.
And yeah, I am actually using my projector as my primary computer "monitor" right now, so using VirtualDub's histogram would definitely be in my best interest. I'll go play around with those settings and try re-capturing the same tape and see how it goes.
Thanks again.
|
|
05-18-2016, 08:06 AM
|
|
Free Member
|
|
Join Date: May 2016
Posts: 15
Thanked 0 Times in 0 Posts
|
|
So I recaptured the same tape again after tweaking the brightness/contrast to get the red edges out of the histogram in VirtualDub. It was really difficult because every new scene location was different, so I basically corrected the worst offender and then the rest of the scenes were pretty much clear of the red bars as well.
I probably didn't do a great job, but I figured I'd post some screencaps for feedback on my first attempt at this.
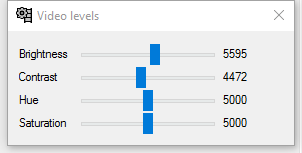
First, here are the levels I ended up with.
Here are the stats for the capture:

Here is a cap from the first capture (no color changes):

Second capture:
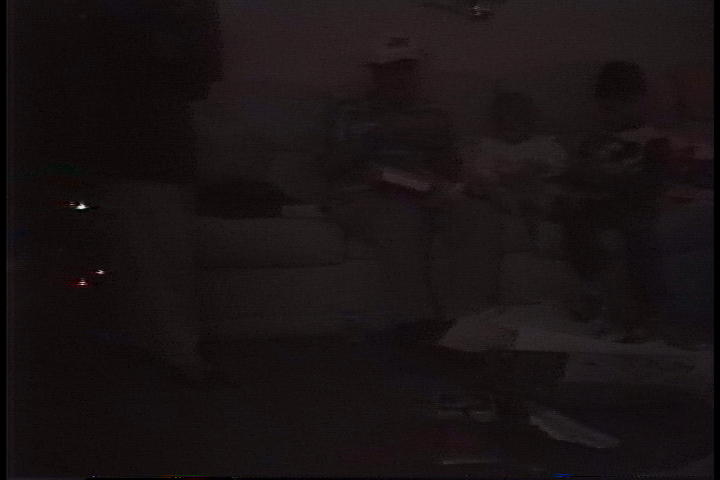
First capture:
Second capture:
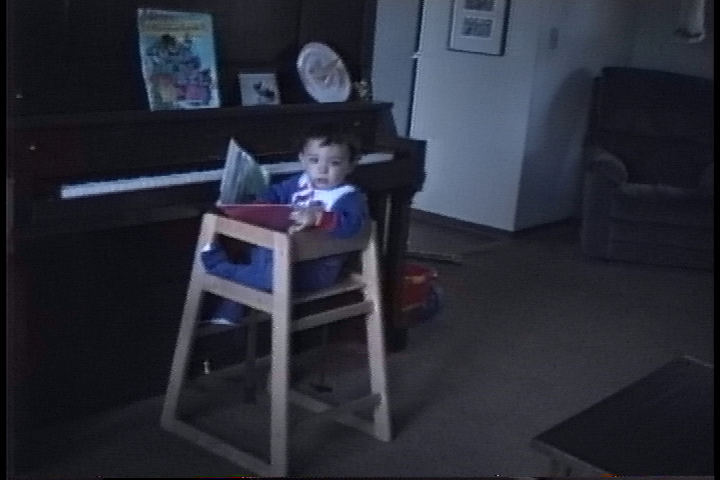
Worst offending scene first capture:
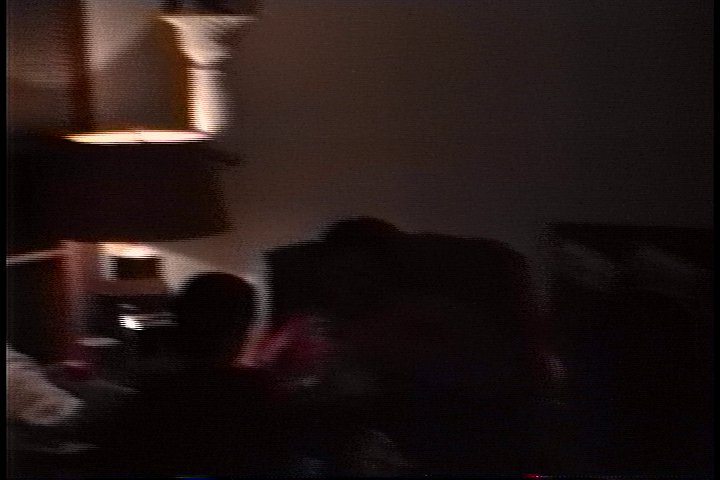
Second capture:
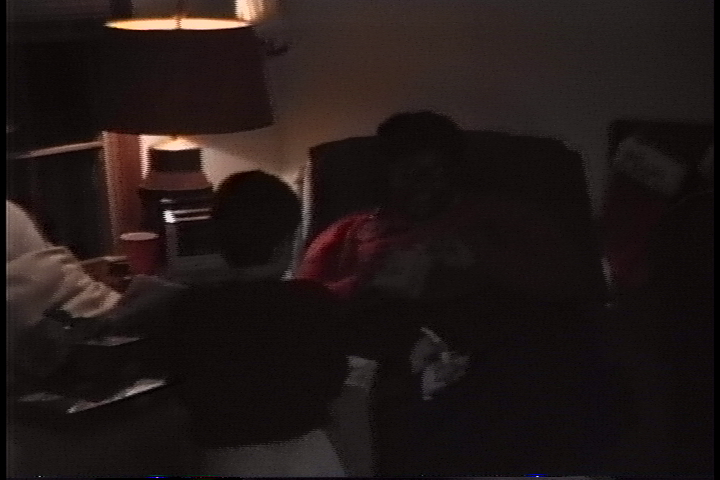
So what do you think? Is it any better at all? Did I go too far, and does it seem like there's a third option somewhere in between that would be better than all the screencaps above? I spent probably an hour or more going through the various scenes on the tape and tweaking brightness/contrast to get the red edges out of the histogram. If I end up with noticeably better results, the time spent doing it is worth it to me. Plus I'll get a lot faster as I improve at it.
Also, I haven't paid for Adobe. I have used it in the past and am familiar with its workflow, so I've sort of been keeping it in my back pocket as an option if I can't find a free/cheaper alternative that is as good (or better). Otherwise, I plan on just subscribing to the premiere cloud a month here and there as needed.
I also just bought the entire AVS4YOU software suite. It's apparently normally priced at $199 and is marked down 70% off this month. I found a code that knocks another 20-30% off that price so I ended up getting the suite for $40. I figured it was worth it to jump on that and then decide later if any of the programs will be useful to me. I've used their video converter in the past and at the moment I'm not aware of a better alternative.
I've also installed DaVinci Resolve, but have not poked around much or really used it yet. Basically my point is, I can use whatever you recommend because I don't already have a sunk cost into much of anything when it comes to software.
Thanks again for the continued help everyone.
Last edited by wolf_in_bull_city; 05-18-2016 at 08:32 AM.
|
|
05-18-2016, 12:18 PM
|
|
Premium Member
|
|
Join Date: Aug 2009
Location: N. Carolina and NY, USA
Posts: 3,648
Thanked 1,308 Times in 982 Posts
|
|
All images show seriously underexposed video, as you probably know. Making multiple captures of problematic originals is par for the course, so join the club (at least membership in this club is free!). As far as I can see, the better images are within a valid levels range, such as they are given the circumstances.
It's possible to get some detail from underexposure, but it has to be done with the original YUV colorspace in Avisynth before doing anything else. The caution here is that underexposure, whether video or pictures, involves noise you won't believe until you see it raised to visible levels. Denoising in that same colorspace is another part of the process. Don't expect perfect results. I've been this sort of thing with my sister's camera antics and other forum posts.
The images have been converted to RGB, so the only way to work is with an unaltered sample of the original YUV capture. You can make an unaltered short sample of several seconds in VirtualDub by cutting a portion of video and saving it as AVI in "direct stream copy" mode. Samples can be posted here.
The most direct way of making images of frame captures is with VirtualDub's top menu toolbar: " Video..." -> " copy source frame to clipboard". Open an image app and create a new image or frame, paste from the clipboard, and save the image as-is.
|
The following users thank sanlyn for this useful post:
wolf_in_bull_city (05-18-2016)
|
|
05-18-2016, 12:34 PM
|
|
Free Member
|
|
Join Date: May 2016
Posts: 15
Thanked 0 Times in 0 Posts
|
|
|
Ok so to attempt to improve the underexposure, I would take my second capture file (that I adjusted brightness/contrast for) and load that into Avisynth?
Ok so to get sample clips and comparison images, I need to queue the tape on my camera up to the specific scenes and then recreate the same brightness/contrast settings and capture clips of that and again with the default settings? Not complaining, just confirming that's the correct pipeline.
Do you have any guides you've done that would help me work on the underexposure with Avisynth?
Thanks!
|
|
05-18-2016, 03:34 PM
|
|
Premium Member
|
|
Join Date: Aug 2009
Location: N. Carolina and NY, USA
Posts: 3,648
Thanked 1,308 Times in 982 Posts
|
|
Quote:
Originally Posted by wolf_in_bull_city
Ok so to attempt to improve the underexposure, I would take my second capture file (that I adjusted brightness/contrast for) and load that into Avisynth?
|
To apply filters and fixes, you'll end up doing some in Avisynth, some in VirtualDub. That's for later. NLE's are OK for cuts and joins, audio, timeline, color, but restoration and repair is not what NLE's are desired for.
Quote:
Originally Posted by wolf_in_bull_city
Ok so to get sample clips and comparison images, I need to queue the tape on my camera up to the specific scenes and then recreate the same brightness/contrast settings and capture clips of that and again with the default settings? Not complaining, just confirming that's the correct pipeline.
|
Not necessary. You already have a capture or two. Open a captured avi in VirtualDub and make your desired cut with VDub's navigation tools in the lower left of VDub's window. Put VDub into "direct stream copy" mode, then save the cut as a sample avi.
Quote:
Originally Posted by wolf_in_bull_city
Do you have any guides you've done that would help me work on the underexposure with Avisynth?
|
What is used depends on specific problems. The best anyone can do with what you've shown so far is to try a few things and see what's possible.
|
The following users thank sanlyn for this useful post:
wolf_in_bull_city (05-18-2016)
|
All times are GMT -5. The time now is 03:30 AM
|


