How to Author DVDs with Sonic DVDit! 2.5 LE/SE/PE
Although Sonic DVDit! PE is a program from 2001, it’s actually quite good at making quality menus, and with minimal effort. It’s only weakness was the ability to create motion menus or author with multiple VTS, features often used by advanced video hobbyists or professional. Ulead DVD Workshop 2, TMPGenc DVD Author and TMPGEnc Authoring Works 4 are all better choices.
This guide is specifically written for the PE (Professional Edition) version of Sonic Solution’s DVDit! authoring package, but it may also work with the SE (Standard Edition) and LE (Limited Edition) version of the program. The LE and SE version just have less features. This guide is not for DVDit 5 or higher, as those are shoddy upgrades that barely function. The SE/LE/PE versions were known as v2.0 to v2.5 (final edition). These were the good ones.
Getting started
Authoring only. Understand that DVDit! is only an authoring application. This means your files must be DVD-compliant and ready for use prior to using DVDit! Although this program offers some limited video encoding abilities, do not use them. The quality is not very good and it takes too long. If you are unsure of your files being DVD-ready, please read the AUTHORING INTRODUCTION article.
Open and begin. Note: DVDit! requires a screen resolution of 1024×768 or greater. Most video software requires this. It is optimal, as it allows you to preview full D1 video at full resolution. If it refuses to open, go to the DISPLAY settings under CONTROL PANELS and up your resolution to 1024×768 or greater with 32-bit or 24-bit true color.
![]()
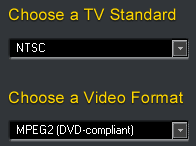
Choose your TV standard and aspect. Being in the USA, I choose NTSC instead of PAL. Also choose your video format for the disc. This program only supports one VTS, meaning you can only have MPEG-1 or MPEG-2 on the disc at the same time. And further than that, all resolution on the DVD must be the same. Most non-professional programs do this. (And yes, this may be the PE version, but it’s still a consumer application compared to the thousand-dollar software used professional.) As stated, the video you are using is probably from tv, and the typical aspect video on non-widescreen video is 4:3 aspect. Choose:

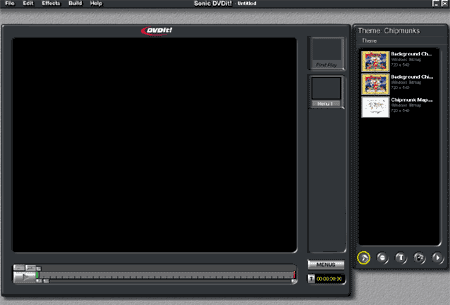
Interface. After OK’ing the aspect, the full DVDit! windows will appear. This is the workspace for DVDit! PE. Become familiar with it. The assets are on the far right. Assets are your source files (video, audio, graphics, etc). The menu bar is in the middle between the assets and the main window that shows the menu or video. The video timeline appears at the bottom next to a play button. The menu bar at top has advanced options in the menus.
I have cropped in tight on most images on this guide.
If you get lost, refer back to this image as needed:
Start project, import assets
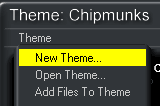
New theme. First make a new theme for the new disc. Name the theme. By default, all themes are saved in the C:\ProgramFiles\SonicSolutions\DVDit! folder and cannot be changed. That is fine. Name it and move on.
Learn the asset menu. At the bottom of the assets window is the asset navigation menu.
1. Backgrounds. The paint-roller is where background images are stored. Background images must be 720×540 or 640×480 resolution BMP images. Other file format like JPEG, TIFF, PICT, Targa and PNG can be used, but it is not suggested.
IMPORTANT! When making menu images, remember that the television set overscan will clip off the outer edges of the menus. Do not place information outside the overscan area. Click here to download a 720×540 Photoshop template. The template should have two sets of boundaries marked with blue Photoshop guides. The inner boundary is where important information (buttons, words, etc) should be placed. The outer boundary is where most television sets cut off on the overscan.
2. Buttons. The “button” button is where menu buttons are stored. Menu buttons must be in Photoshop PSD format. DVDit! can scale button sizes.
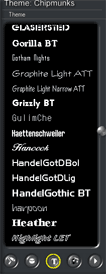
3. Fonts. The text (T) button accesses all the fonts on your system. It is suggested that you have a large selection of easy-to-read fonts. San-serif fonts are suggested for DVD work as they are easy to read, and will not pixelate like a serif can.
4. Audio/Video Assets. The filmstrip is where all the audio and video files are imported. DVDit! can only import M2V (or similar-named MPEG video-only files) and WAV or AC3 audio files.
5. Preview. The play button on the far right is the preview button. You can use it to pull up a virtaul DVD player and preview your project in real-time.
![]()
Add assets. In order to import assets into any window, right-click in the blank space in that window and bring up the “Add Files To Theme” menu. Select it and open files as normal.
![]()
Using the assets to layout the disc
After importing all your assets, it is time to layout the DVD structure. DVDit! is a drag-n-drop interface, making layout simple. Continue on to the next step…
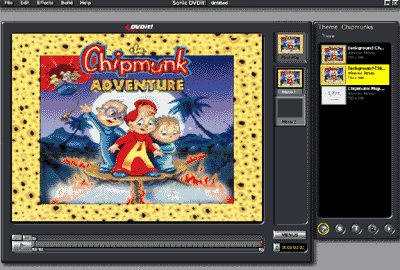
Starting on the menus. Drag your main menu images to the MENU1 button. In this example, I am making a dual-menu disc. The FIRST PLAY is the first thing that is shown when the disc is played. For my first play, a Dolby Digital movie is being used, having been dragged from the AUDIO/VIDEO asset menu to the FIRST PLAY button. By default, the main menu will become the first play unless it is changed.
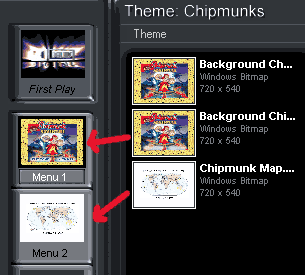
Work on main menu. Now that the menu background has been laid out, it is time to place buttons on it and link the video/audio files to make the disc play. In this example, text buttons are being used instead of images. The Chipmunks movie will use a “PLAY MOVIE” and “VIEW MAP” button on the main page.
Select a font to use from the TEXT asset menu and then drag it onto the menu in the main window of DVDit!:
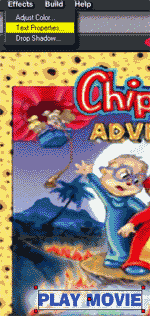
Text button properties & movie linking. After dragging the text box to the main menu, and typing what needs to appear, it is time to select the font size, font color and other aspects of how the button will appear. Goto the EFFECTS menu and select TEXT PROPERTIES. Here you can alter the size and other attributes of the text.
Option: Select SAVE SETTINGS if you want multiple text objects to appear the same. Merely open the new TEXT object and the saved settings will automatically kick into effect.
Drag the video and audio assets (must be done separately, first video, then audio for each movie) from the audio/video assets menu on top of the text. In the example shown, the movie was dragged onto the PLAY MOVIE button after I finished customizing the color size.
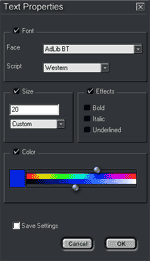
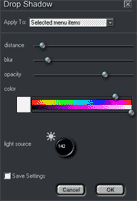
More text properties. In addition to the normal size and color options, the shadow can be customized as well. Including angle, density, color, distance and more:

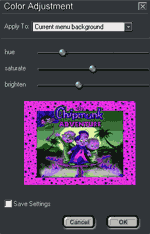
Menu color adjustment. Instead of opening the menu background image in Photoshop again, backgrounds, menus and even text buttons can be altered by DVDit! in this menu. The hue, saturation and brightness can be altered to make the menu even more perfect:
![]()
Menu audio. Although DVDit! does not have motion menus (this being its only real drawback), it can have music in the menu. A graphically appealing still image and appropriate music will make a still menu just as good as a motion menu.
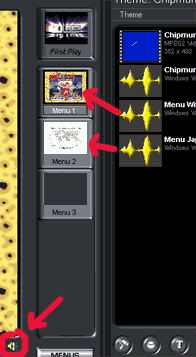
Drag the audio file onto the menu shown in the menu bar. After doing so, the SOUND icon should appear at the lower right side underneath the menu in the main window, as illustrating in the image below:
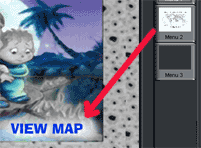
Menu linking. Now that the audio has been properly added to the menus, and the movie was properly added to the main menu (on the PLAY MOVIE button), it is time to link the bonus menu (VIEW MAP) to the main menu. Like other assets, a menu can be grabbed from the menu bar and linked to buttons or text buttons. The bonus menu should be dragged onto the VIEW MAP button that was made on the main menu.
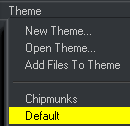
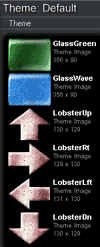
Now that the bonus menu is linked, it must provide a return link to the main menu. While you can easily make a RETURN TO MAIN MENU text button, that’s kind of ugly. Instead, change the theme back to the DEFAULT theme that comes with images supplied by DVDit! The arrows are nice, and a LEFT (or BACK) arrow was used on the bonus menu. The main menu was then linked to the BACK button.
Video chapters. Now that the menus are completed and all files have been linked, chapter can be added. While there are several ways to do this, the easiest is the sloppy method that I tend to use. I call it “sloppy” beacuse chapter mark are made at random, mostly just to divide the movie up into equal lengths. Since few people use chapters anyway, not a big deal, although the “sloppy” is noticed when a chapter mark happens in the middle of a word or sentence.
Simply select the menu button containing the movie, and the timeline will light up. Double-click in the upper dark gray half of the timeline, and a new chapter mark will appear. These can even be named.
The more precise method is to, again, select the menu button with the movie you want to add chapter to. But this time, hit the PLAY button and pause when you find a good spot to drop a chapter mark. Again, double-click in the dark gray area. Drag the timeline arrow to skip ahead (because playing the whole movie would take forever), but be sure to not move your mouse outside the light-gray area when dragging (otherwise it will not work).

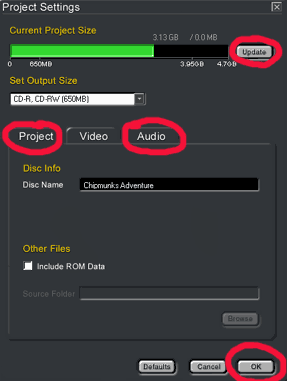
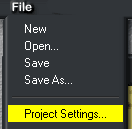
Final settings and optional audio conversion. With the disc essentially complete, with the video ready and menus ready, it is now to to check the disc settings and make sure it all fits. Goto FILE -> PROJECT SETTINGS. Under the PROJECT tab, name the disc. Then move on to the AUDIO tab…
After setting the audio, come back here and click UPDATE to see the final size.
Note: It MUST be under 4.38GB. DVDit! PE uses 4.7GB as the measurement, but it is NOT using the same 4.7GIG that a DVD-R is advertised as. A 4.7 “GIG” disc is 4.38GB on the computer. Sonic Solutions should fix this bug.
FYI: Leave the video tab alone. It is not being used.
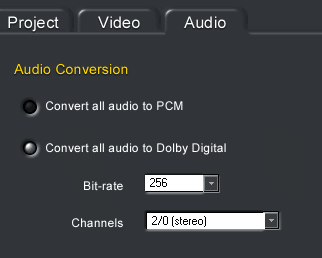
The Dolby Digital AC3 option is only available on the PE (Professional Edition) of DVDit! I have found it to be the best audio encoder around, far surpassing the quality made by Sonic Foundry SoftEncode and BeSweet. The PE will take your WAV and make it AC3. Be sure to use STEREO and a bit-rate of 256k. Many DVDs use 192k and 224k audio, but the file size differences are maybe a few dozen MB each, at most. Always go for better quality, especially since the size difference is negligible…
Don’t forget to go back and click UPDATE to verify file size!!!
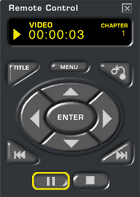
Preview. Now that you are set, make sure no mistakes were made. Click the PREVIEW button at the bottom of the assets manager. It will bring up this virtual remote control. When finished previewing, click the X box on the remote to close preview mode.
Ready to author then burn. Congratulations. The process is complete and it is now time to author. It may take up to 2 hours to author a disc, depending on the length of the video footage and the use of the Dolby Digital AC3 encoder. About 30 minutes if the movie is only 90 minutes and PCM is used.
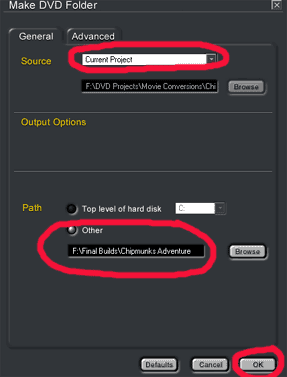
While DVDit! PE can burn, it is known to crash while burning and make coasters out of your discs. It will take the same length of time to burn whether DVDit! is used or another program like Nero 5.5.10.20 is chosen. Given my experience at DVDit! coasters, I let DVDit! author the DVD folder to the hard drive. Click MAKE DVD FOLDER from the BUILD MENU (next to File, Edit, etc) and selected a place on the HD. After it is done authoring, just open up your favorite DVD-Video burning program (like Nero) and burn. DVDit! does not work well with 4x media either, making it burn at 2x. Another reason I only use it to burn. I get the feeling this program was only made to author, as neither the burning function nor the video encoder work very well.
Again, after authoring, it is time to burn the files onto a DVD with a good burning application. This site has guides for both Nero and RecordNow Max, two options that are highly suggested.
Copyright Notice: All guides, articles and editorials found on digitalFAQ.com are copyright by The Digital FAQ and/or the respective authors. Articles may not be copied, borrowed, full-quoted or reproduced in any manner, online or in print, which includes blogs and forums, without the written email consent of Site Staff (which may or may not be given, for free or fee). Know that digitalFAQ.com staff does routinely monitor online plagiarism, and we do send takedown notices to site admins and/or web hosts (DMCA et al legal actions) as is necessary. If you would like for others to read articles found on The Digital FAQ, simply link to our content. (Note: Printouts for personal use is specifically allowed.)