First you'll need the
AC3ENC.DLL file. This is the AC3 encoder for BeSweet. Put it in the BESWEET folder.
Next start up the BESWEET GUI. The GUI should be in the same folder with BESWEET on your computer. When you first start BESWEET GUI, it'll ask for the location of the BESWEET.EXE to run.

Now, most things can be left at default values. Very few things need to be changed.
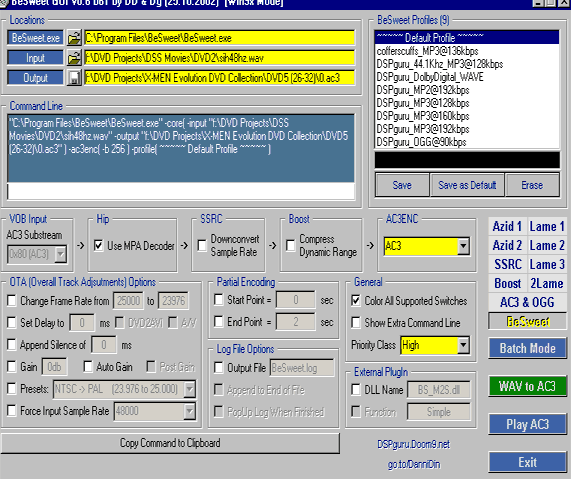
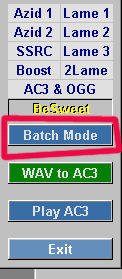
Now, while you can set INPUT and OUTPUT one at a time, I hate to do it that way. I use the BATCH MODE always. Even if doing just one file, it goes faster on my end.
Now this is just info, DO NOT click on it yet. That will come a little later.
I just set the OUTPUT FILENAME to "0" (easy key on keyboard), and then it will auto-name the new file the same as the source (except it will have .AC3 extension now).

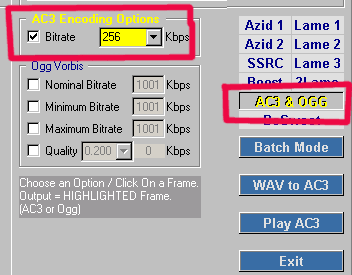
Next is setting up the AC3 values. By default, the program uses 384k as the bitrate. I like 256, as it sounds just as good almost always, and takes less room. 256 provides richer sounds than 192 or 224, at least from most homemade VHS or tv source.
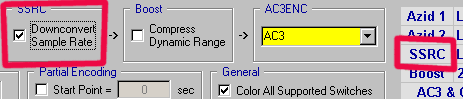
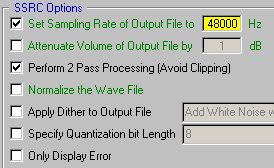
This guide assumes you have 48hz stereo audio as your source. If you have to convert to 48hz too, you'll need to use the SSRC function.
So far, you've set up the OUTPUT folder, the AC3 settings, the BESWEET application setting, and only thing left to do is convert the audio.
NOW click on BATCH MODE and it'll bring up a window. This is a DRAG-N-DROP interface.
The files should appear in the BATCH WINDOW. Click the BESWEET -> MULTIPLE AC3 button. Using the SINGLE AC3 option would merge all files into a single audio file (useful, but probably not what you're going for).
You'll see a progress bar in a DOS SHELL window and then it will do the files one by one, OUTPUTTING to the folder you specified with the same filename as the source, but with the new extension. SOUND.WAV will now be SOUND.AC3 in the output folder.
If you need any more clarification or have more questions, ask away.


