How to Properly Repair a VHS Videotape/Cassette in 5 Minutes
The Frequently Asked Questions:
- How do I fix a VHS videotape?
- How can I restore a broken video cassette?
- How to fix a VHS-C video tape from a camcorder?
- How do I convert a VHS-C tape into a VHS tape?
- Help! My dog ate my VCR tape! (Seriously, this happens!)
… and The Digital FAQ answers!
Most VHS repair guides online have really bad advice. Those guides either show:
- (A) a slow method that will literally take hours, or
- (B) a dangerous method that is almost guaranteed to destroy the heads on your VCR or video camcorder.
Back in the 80s and 90s, we’d look at such folks like they were complete idiots. For example, many Youtube guides, or the “DVD Your Memories” guide that often comes up #1 in a Google, search gives horrendous advice, tells you to use “splicing” tape or Scotch tape.
But you should never, ever use adhesive tape of any kind! That’s how VCR heads get ruined. Every day our Video Hardware Repair forum is visited by folks with damaged VCRs. And one of the most common issues is damaged heads — as caused by rotten advice like that.
This guide will show you how to properly and safely fix a VCR tape!
A standard T120 VHS tape repair job takes less than 10 minutes, and a smaller VHS-C tape takes less than 5 minutes. Yes, it can be done! There’s no need to sit there for hours manually winding a tape like a goober. Nor risk damaging your VCR/camera.
Tip: Read this whole guide before trying to follow the instructions. Give it a once-through, to familiarize yourself with the whole process. Step 3 also mentions some tape repairs that are best left to the experts, and probably should not be attempted on your own.
Supplies / Tools
You’ll need a few basic supplies and tools:
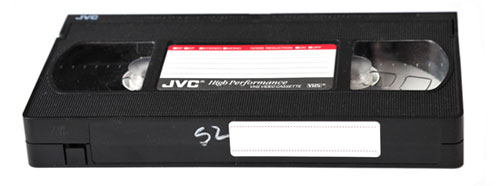
Another full-size VHS tape:
— It needs to be the common screw-type cassette (and most are). Either make sure that it’s blank, or that it has something that you never again need.

Exacto knife:

Scissors:

Small Phillips-head screwdriver:
— Be sure it fits snugly — not too tight, not too loose. We do NOT want to strip the screws!

Socket screwdriver:
— You will not be using any of the interchangeable socket bits — just the empty screwdriver.

Foam ear plug:

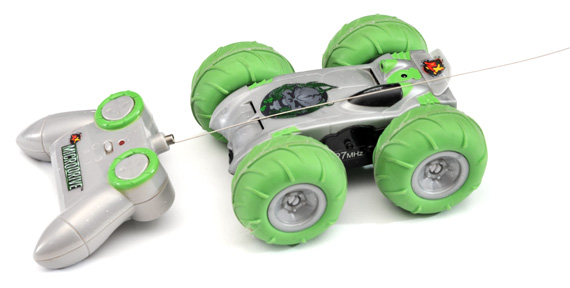
A remote control toy car:
— Yes, you read that right! Either pull one from “that box” in the garage/closet, or temporarily steal borrow one from your child. This is the main ingredient that turns this into a 5-10 minutes task, and not an hour -long task.

Most everybody has these things in their home or office. (If not, go get them! Don’t be lazy/stupid and simply look for another guide — one that tells you how to ruin your VCR!)
Step 1: Disassembling the Donor Tape | Part 1
You’ll be completely gutting this cassette, and the existing tape inside will be trashed! So be very sure that this donor tape is either blank or unwanted. I highly suggest that you put the tape in a VCR, rewind it all the way, and either (1) fast forward while playing, or (2) spot check it every 10-15 minutes. It would be a tragedy if a valuable tape was destroyed!
1. Fully rewind or fast forward the tape.
All of the tape needs to be located on one reel. Otherwise, the disassembly step will take twice as long.
2. Remove the spine label.
Use the exacto knife and carefully slice the old spine label in half. Ideally, the label should be removed, but slicing it will probably be needed on older tapes where the sticker glue has hardened. Do NOT use liquid (water or alcohol) on the spine, and try to remove the label that way. You never want liquid around videotapes. If you’re using a new tape, then this sub-step probably will not apply.
3. Remove the screws.
There should be 5 screws. Set the screws aside (you will need them again!)
4. Open the cassette, remove the reels.
Put the tape flat on a table. It will stay here until the repair is finished. When the tape is rightside up (reel holes down), and the spine is toward you, there will be a small button on the upper right side. Press it in, and hold it.
While firmly grasping the sides of the clamshell, gently open the gate. (Warning: You must keep the tape flat! Do not turn it sideways!)
Now gently separate the two halves of the clamshell. Set the top half to the side; the spring will contract, and it will “close”. (Warning: If you are not gentle, then the delicate springs on the cassette may get bent, or you may loose the tiny parts that are required for proper clamshell functionality!)
5. Remove the reels from the clamshell.
Locate the spool stoppers:
Gently pull back both stoppers, while holding the clamshell firmly to the table. Wedge the ear plug in the gap. The reels can now move freely; this will be important for a later step.
Remove both reels.
Use the scissors, and cut the tape. Cut the black part, not the clear leader, for the sake of practicing. Notice that the tape is not easy to cut! You must hold it firmly with your fingers on one hand, while using sharp scissors (pressed tightly against the tape) with the other hand. Video tape is a very resilient piece of mylar coated with metallic particles. Contrary to popular myth, a tape does not “die” in a mere 10-15 years. Dull scissors will never be able to cut it.
Set the empty reel to the side. We’ll get to it in a minute.
Step 2: Disassembling the Donor Tape | Part 2
1. Gutting the tape.
We’re going to de-spool the donor tape the quick way! So get a trashcan ready — you’re going to need it. And do this on a soft surface — the couch, in bed, on carpet. You do not want the reel to fall onto a hard tile/concrete floor, and break.
Take the socket screwdriver, and place the empty socket end in the bottom of the full donor reel:
Now … spin, spin, spin! ![]()
This is easily the most time-consuming step of the process. It takes me about 3 minutes to completely empty a T120 VHS reel. If you drop the reel, it may take you longer. I would suggest you empty the reel directly into a trashcan. When finished, you’ll have a mountain of tape:
2. Reel disassembly.
Now cut the tape from the second reel, just as you did with the first reel. Now look closely at the reel. Do you see the small tab holding the tape in place?
Use the small flathead screwdriver, and gently push the tab up. It should slide easily. But don’t entirely remove it yet.
Step 3: Disassembling the Source Tape.
Your broken VHS videotape — the source tape — can vary widely in terms of damage. You may be able to simply unscrew it, as you did for the donor tape in step 1.3. Others may be so badly damaged that you need to drill out the screw holes with a power drill (with a tiny bit). Quite a few VHS tapes have no screws, and must also be drilled out. VHS-C tapes are especially a nuisance, either requiring small Japanese specialty screwdrivers, or turning into yet another drill job because the screws are stripped or rusted.
We’ve handled some pretty mangled tapes for customers using our video conversion services. This guide is intended for the easier repair methods that you can DIY at home (i.e. screws, not drills). For more advanced repairs, we suggest sending it to us. It’s too easy to further physically damage VHS tapes when you’re not experienced in tape repair. (For example, a drill job is a two-person repair. I bet you didn’t know that!)
For this example, I’m using a VHS-C tape that was chewed on by the family pet. Yep, Rover doesn’t just eat homework — he eats tapes!
Understand that there will always be some footage loss with a tape repair — up to 1-2 feet. And while that may seem like a lot, it’s not. A T120 VHS videotape has more than 800 feet of tape inside. SP is about 7 feet per minute. LP is half that, and SLP/EP is one-third. So that 1-2 feet of lost footage equates to less than 1 minute of footage. In the example footage shown here, notice that the right reel has almost nothing on it (and was 10 inches long). It’s unrepairable, and discarded.
And yes, this means that a damaged source tape that has usable footage on both reels will create two new tapes. ![]()
Step 4: Creating the Repaired Tape
This is the fun part, when you use our repair method. ![]()
1. Setting up the re-spool.
Look at the donor tape reel carefully. Notice how the videotape’s underside is tabbed in clockwise, but then the reel is wound counterclockwise (with the tape properly facing outwards). This needs to be replicated when spooling the old tape onto the donor reels. You do not want to spool the tape on upside-down or backwards! (Hint: The shinier side should always face out, while the duller side faces in — though sometimes it’s hard to see shiny vs. dull.)
Use sharp scissors to cut the end of the source tape, so that it is flat and smooth. You cannot easily re-spool crinkled or frayed videotape onto the reels.
———— GUIDE NOT FINISHED
proper around both posts
start to place top on bottom, hold flip re-screw
pop safety tab. relabel